Replacing a deck isn’t just another home improvement task — it’s an investment in your property’s comfort, safety, and long-term value. A well-planned deck replacement transforms your outdoor space into a functional extension of your home, whether you’re creating a cozy spot for morning coffee or a large entertaining area for family gatherings.
But before the hammers start swinging, preparation is key. Taking time to plan your layout, choose the right materials, and get your space ready can make the difference between a smooth, on-schedule build and one filled with unexpected delays.
In this guide, we’ll walk through the essential steps homeowners should take to ensure a successful project — from evaluating your current deck and setting a realistic budget to clearing your yard for construction.
Still budgeting your project? Start with our full guide on deck replacement costs to understand how size, materials, and design choices can impact your investment.
Step 1 – Evaluate Your Current Deck and Yard
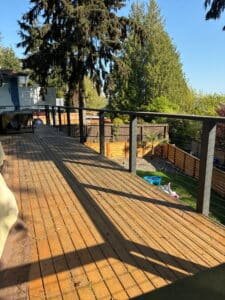
Before you start designing your new deck, take a close look at what’s already there. A thoughtful inspection helps you identify any existing issues, plan around your yard’s natural layout, and avoid costly surprises once construction begins.
- Inspect your deck’s structure: Check for signs of deterioration such as rot, soft or spongy boards, wobbly railings, rusted fasteners, or water-damaged support posts. These issues often indicate that your deck’s structural integrity has been compromised.
- Assess your yard layout: Consider property lines, slope, and drainage patterns. A well-graded yard helps prevent water pooling under your future deck — a common cause of premature wood decay. Take note of where sunlight hits throughout the day so you can plan for shade or privacy if needed.
- Note obstacles: Identify anything that could affect construction, such as trees, HVAC units, sprinkler systems, or underground utility lines. Planning around these early saves time and money later.
In some cases, you may only need to repair or resurface your existing deck by replacing surface boards while keeping the substructure intact. However, if you notice significant rot, shifting posts, or structural instability, a full replacement is often the safer and more cost-effective choice in the long run.
Not sure if your deck needs repair or full replacement? Here’s how to tell — and what it costs — in our deck replacement cost guide
Step 2 – Plan Your Deck Design
A great deck starts with a clear vision. Taking time to plan your deck’s design ensures that the finished result matches your lifestyle, complements your home, and fits seamlessly within your yard. Thoughtful design also helps your contractor estimate materials, timeline, and budget more accurately.
- Determine the purpose: Think about how you’ll use your new deck day-to-day. Will it be a quiet spot for morning coffee, a dining area for family gatherings, or a large entertainment space for guests? Knowing your main purpose will influence everything from layout to material choice.
- Decide on size and shape: Measure your available space carefully and choose a layout that enhances—not overwhelms—your yard. A well-proportioned deck should flow naturally from your home’s interior to your outdoor area, allowing room for furniture, walkways, and landscaping.
- Consider special features: Built-in benches, planter boxes, outdoor lighting, and pergolas can transform your deck into a year-round living area. Include these details in your initial design phase to avoid costly add-ons later.
Pro Tip: Before finalizing your design, walk the space with your deck contractor and use stakes or tape to outline the proposed deck footprint. This helps you visualize scale, flow, and furniture placement — and ensures the deck feels right before construction even begins. For expert design insight and professional craftsmanship, visit Orca Roofing & Exteriors to explore how our team can help bring your new deck to life.
Step 3 – Choose the Right Decking Material
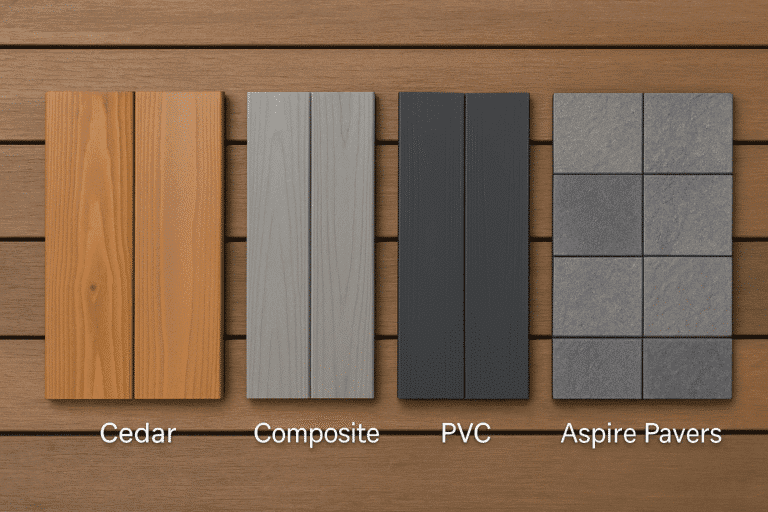
Selecting the right decking material is one of the most important decisions you’ll make during your deck replacement. Your choice will determine not only how your deck looks, but also how it performs over time in the Pacific Northwest’s wet, variable climate. The best material balances aesthetics, maintenance needs, and long-term durability.
Cedar:
A timeless option known for its rich, natural beauty. Cedar blends seamlessly with Northwest landscapes but requires regular sealing and cleaning to prevent moisture damage and fading.
Composite:
A durable, low-maintenance alternative made from recycled wood fibers and plastic. Composite decking resists rot, warping, and insects—ideal for homeowners seeking a modern look with minimal upkeep.
PVC or Aspire Pavers:
For a truly premium option, PVC and Aspire Pavers by Brava offer exceptional longevity and moisture resistance. These materials are perfect for the Pacific Northwest’s rainy conditions and provide a sleek, contemporary finish.
Choosing the right material upfront can save you thousands in future repairs and maintenance.
Compare all your options in our Best Decking Material Guide to see which type best fits your budget, lifestyle, and design goals.
Step 4 – Prepare the Site
Once your design and materials are set, it’s time to get your property ready for construction. Proper site preparation helps your contractor work efficiently and reduces the risk of delays once the project begins.
- Clear furniture, grills, and décor: Remove any items from your current deck or surrounding patio area to give the crew clear access to the workspace.
- Trim bushes or trees around the work zone: Overhanging branches or dense shrubs can obstruct movement and slow down progress.
- Make space for material delivery: Designate a flat, accessible area for lumber, tools, and supplies to be safely stored during the project.
- Notify neighbors of noise and project dates: A quick heads-up can prevent conflicts and maintain good relationships, especially for multi-day builds.
Step 5 – Secure Permits and Check Regulations
Before any construction begins, make sure your deck replacement complies with local building requirements. Many cities and counties in Washington State have specific codes for decks — covering everything from height and railing safety to structural load and setbacks. Skipping this step can lead to costly fines or delays later on.
- Contact your local building department early: Ask about the required permits for deck replacement or expansion. Requirements can vary depending on your deck’s size, height, and distance from the home.
- Verify property setbacks, height limits, and railing codes: These rules ensure your deck meets both safety standards and neighborhood zoning regulations.
- Rely on your licensed contractor for guidance: Most experienced contractors, including Orca Roofing & Exteriors, handle the permitting process for you — but it’s always smart to confirm that all necessary paperwork is filed before work begins.
Taking time to secure the proper permits not only keeps your project on the right side of the law but also ensures your new deck is safe, durable, and built to code.
Step 6 – Work with a Qualified Deck Contractor
Even the best deck design and materials won’t reach their full potential without expert installation. Partnering with a qualified, experienced contractor ensures your deck is built safely, efficiently, and to code — giving you lasting quality and peace of mind.
Look for contractors who are:
- Licensed, insured, and experienced with local conditions: Washington’s wet climate demands specialized knowledge of waterproofing, drainage, and material performance.
- Familiar with your chosen material: Whether you’re using composite, PVC, cedar, or Aspire Pavers, make sure your contractor has proven experience with that specific product type.
- Transparent about pricing and timeline: A trustworthy builder provides detailed estimates, clear timelines, and open communication throughout the process.
Pro Tip: Always ask to see examples of previous deck projects and read local reviews before signing any contract.
Learn how to find the right team in our guide to Deck and Patio Builders Near Me — and get tips on comparing quotes, verifying credentials, and spotting red flags before hiring.
Step 7 – Get Ready for Construction
With your design finalized, materials selected, and permits secured, it’s almost time to break ground. A little organization before the crew arrives can help the project move smoothly and stay on schedule.
- Arrange material deliveries ahead of time: Confirm delivery dates with your supplier or contractor to ensure all decking materials and hardware are on-site when work begins.
- Set aside a staging area for tools and supplies: Choose a flat, accessible spot near the construction zone where workers can safely store materials and equipment.
- Keep pets and kids away from the construction zone: Deck replacement involves power tools, nails, and debris—so it’s best to restrict access to maintain safety throughout the project.
- Confirm estimated completion and cleanup details with your contractor: Clarify daily work hours, project milestones, and post-construction cleanup responsibilities to avoid any confusion later on.
Step 8 – Plan for Life After Installation
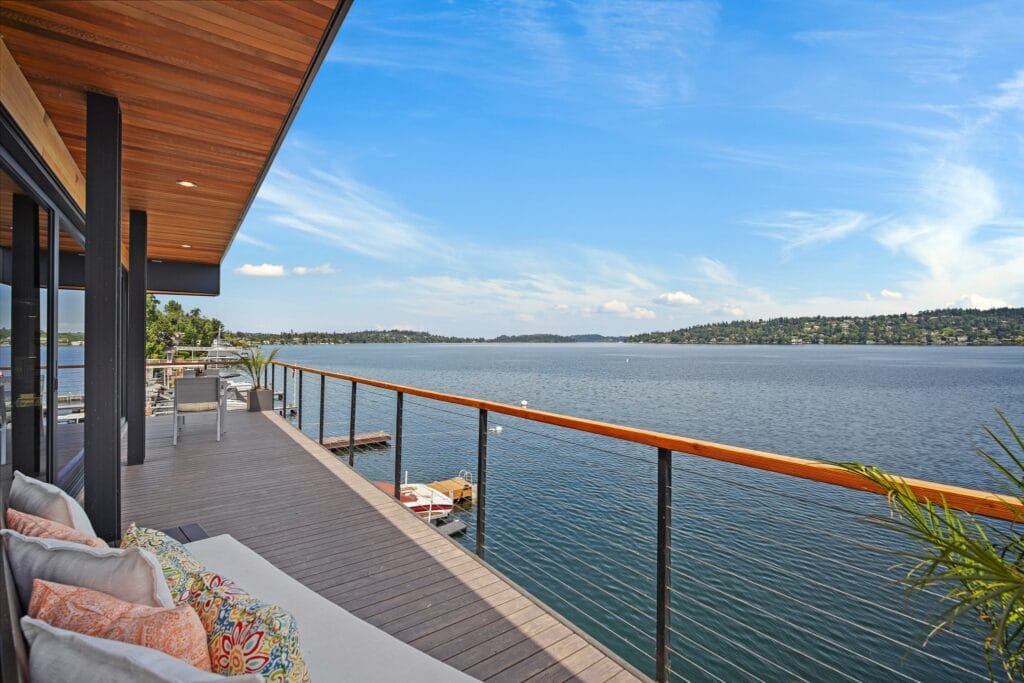
Once your new deck is complete, it’s time to enjoy your upgraded outdoor space — but also to protect it. Routine maintenance and smart design choices will help your deck stay beautiful and structurally sound for years to come.
- Seal or clean your deck regularly: Natural wood decks like cedar need sealing every 1–2 years to prevent water damage and fading. Composite and PVC decks require less upkeep but should still be cleaned periodically to remove dirt and mildew.
- Schedule inspections every few years: Checking for loose boards, railings, or fasteners ensures safety and helps you catch small issues before they become costly repairs.
- Add décor or furniture that complements your deck material: Choose weather-resistant furniture, soft lighting, and durable rugs to create a comfortable, inviting space that enhances your deck’s look and functionality.
Pro Tip: Consistent care extends your deck’s lifespan — and increases your home’s resale value. For professional maintenance advice and long-lasting results, you can always reach out to the team at Orca Roofing & Exteriors.
Final Thoughts – A Smooth Deck Replacement Starts with Preparation
Every successful deck project begins long before the first board is laid. By assessing your existing structure, selecting the right materials, and preparing your space ahead of time, you set the stage for a seamless build and a stunning final result. A well-prepared homeowner can save time, reduce stress, and enjoy a deck that enhances both their home’s value and daily lifestyle.
Whether you’re planning a small refresh or a full rebuild, thoughtful preparation ensures your investment pays off for years to come.
Want to understand how material and size affect pricing? Read our detailed breakdown of deck replacement cost to start budgeting with confidence and clarity.
Frequently Asked Questions About Deck Replacement Preparation
Do I need a permit to replace my deck in Washington?
Yes — in most cases, you will need a permit to replace your deck in Washington. Cities and counties throughout King and Pierce County typically require permits for any structural changes, including deck rebuilds, expansions, or height adjustments. If you’re simply replacing deck boards (a resurfacing project) without altering the frame, you may not need one—but always confirm with your local building department. Permit requirements can vary depending on your deck’s height above ground, proximity to property lines, and attachment to your home.
Hiring a licensed contractor like Orca Roofing & Exteriors can simplify the process, as most professionals handle permit applications and inspections on your behalf to ensure your project meets all local codes.
How long does a typical deck replacement take?
The average deck replacement project takes between one and three weeks, depending on several key factors:
- Deck size and design complexity: Larger or multi-level decks naturally require more build time.
- Material type: Composite and PVC decks can be installed more quickly since they require less finishing work than wood.
- Weather conditions: Rainy or cold weather can delay work, especially during the curing phase for concrete footings.
- Permitting and inspections: Some municipalities require on-site inspections at specific stages, which can affect timelines.
Your contractor should provide a detailed project schedule during the planning phase, including estimated start and finish dates, material delivery times, and potential weather contingencies.
What should I do before my contractor arrives?
Preparing your space ahead of time helps your project start on schedule and ensures safety for both workers and your household. Before your contractor arrives, be sure to:
- Clear the area: Remove furniture, planters, grills, and décor from the existing deck or work zone.
- Trim vegetation: Cut back any trees, bushes, or shrubs that could block access or drop debris onto the site.
- Provide access: Make sure gates are unlocked and there’s a clear path for material delivery and disposal.
- Protect nearby areas: Move outdoor items or cover plants that might be affected by construction dust or debris.
- Communicate special considerations: If you have pets, limited parking, or specific work-hour preferences, share these with your contractor in advance.
- These small steps make a big difference in keeping your project organized and efficient from day one.
How can I save money on deck replacement?
There are several ways to make your deck replacement more cost-effective without sacrificing quality:
- Choose low-maintenance materials: While composite or PVC decking may have a higher upfront cost than cedar, they save thousands over time by eliminating staining, sealing, and frequent repairs.
- Schedule during off-peak seasons: Contractors are often more flexible—and sometimes more affordable—during late fall or early winter when demand slows.
- Keep the existing structure (if safe): If your substructure is in good condition, you may only need to replace the deck boards, not the entire frame.
- Get multiple quotes: Comparing bids from reputable contractors ensures you’re paying a fair price for both materials and labor.
- Plan ahead: Avoiding last-minute changes to design or materials helps prevent additional costs and delays.
For a detailed breakdown of pricing factors, including materials and labor ranges, check out our comprehensive guide on deck replacement cost